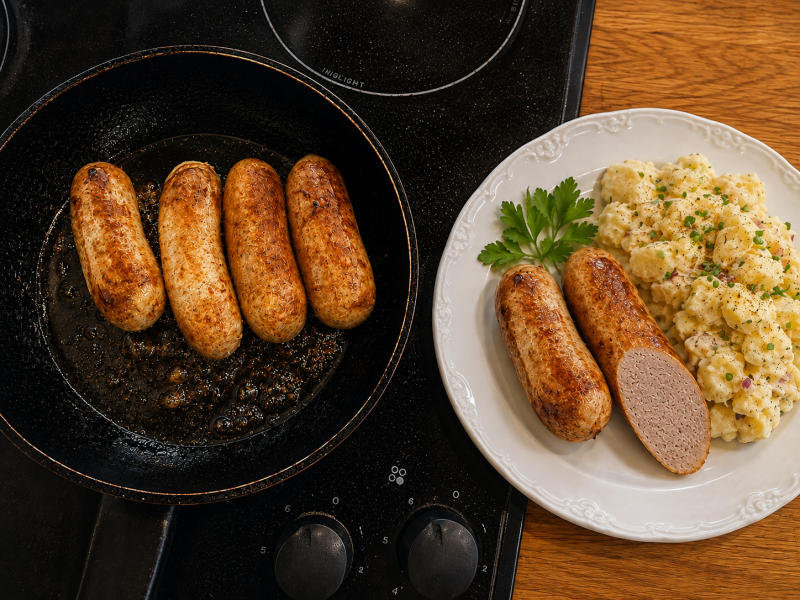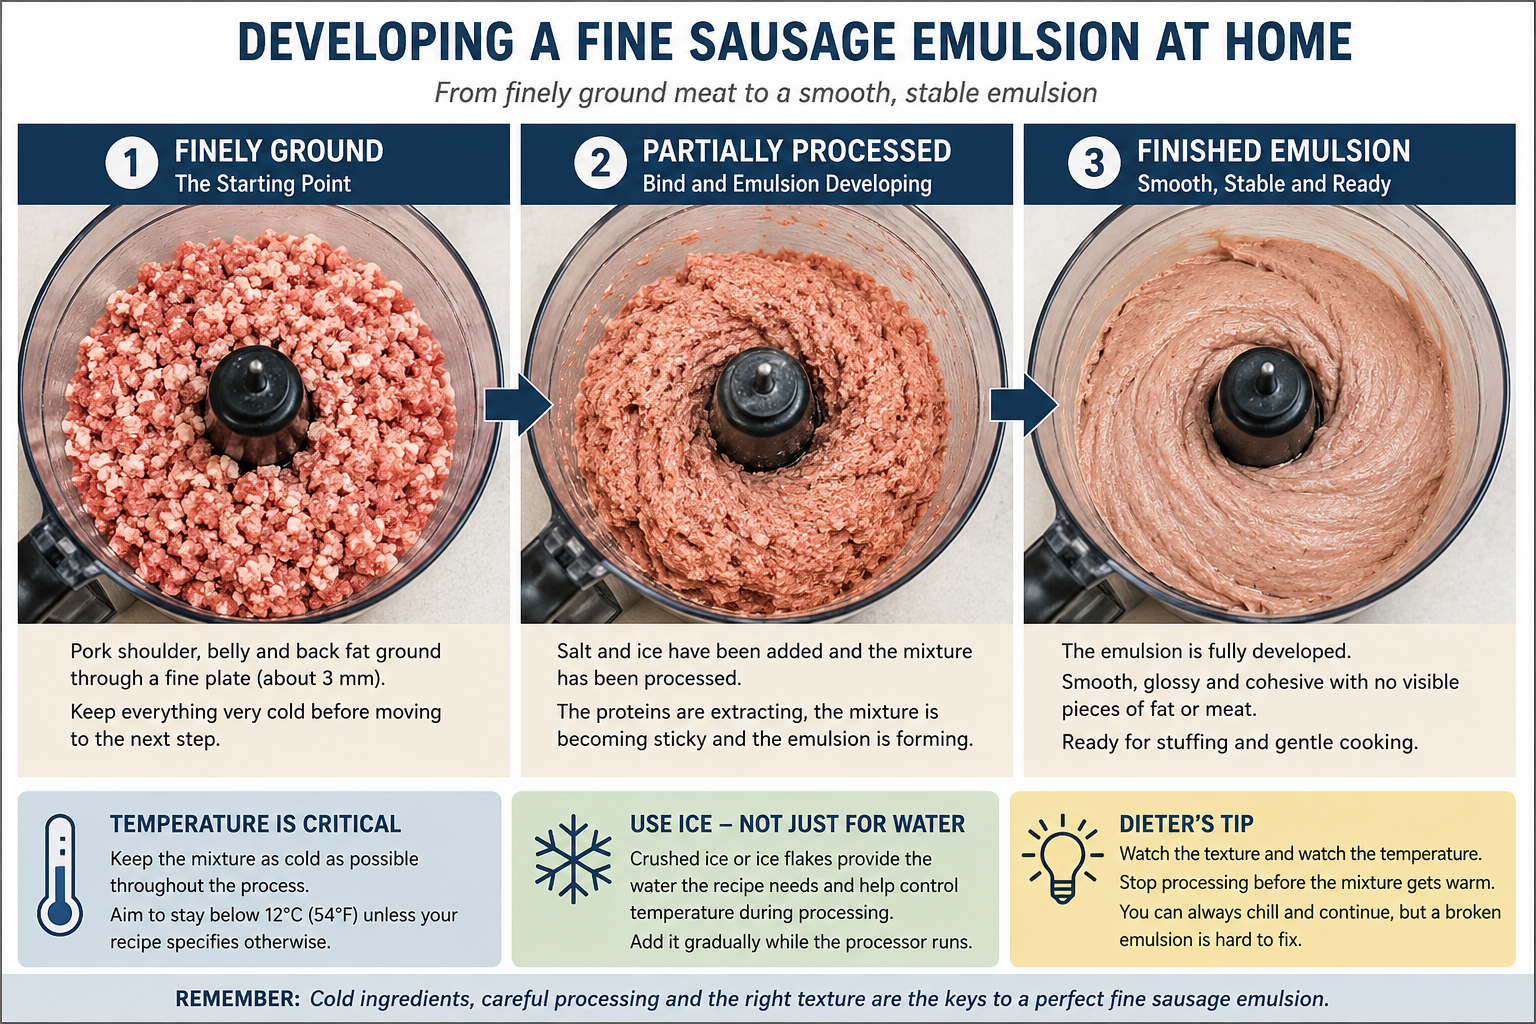
Fine Bratwurst, Frankfurters, Lyoner and many other classic sausages have something immediately noticeable in common: when you cut them open, you don't see the coarse particles of meat and fat found in a traditional fresh sausage.
Instead, the interior is smooth, uniform and finely textured.
Producing that texture may look like something that requires a professional butcher's bowl cutter, but surprisingly good results can be achieved in an ordinary home kitchen with a meat grinder and a capable food processor.
The secret isn't simply processing the meat until it's smooth. The real challenge is creating that fine texture while keeping the mixture cold and maintaining a stable bind between meat proteins, fat and water.
What Is a Sausage Emulsion?
The term emulsion is commonly used in sausage making to describe the finely processed mixture used for products such as Frankfurters and Lyoner.
In practical terms, we're creating a finely chopped meat mixture in which extracted meat proteins help bind water and finely dispersed fat into a stable structure.
When this structure is properly developed and subsequently cooked, the sausage retains its moisture and fat and develops the smooth, springy texture associated with a good fine sausage.
If the mixture becomes too warm or the bind fails, fat and water can separate during cooking, leaving a greasy sausage with a poor texture.
You Don't Need a Professional Bowl Cutter
Commercial sausage makers normally use a bowl cutter for this process. These machines can rapidly chop large quantities of meat while controlling particle size and emulsion development.
For a home sausage maker, buying one simply to make a few kilograms of sausage is difficult to justify.
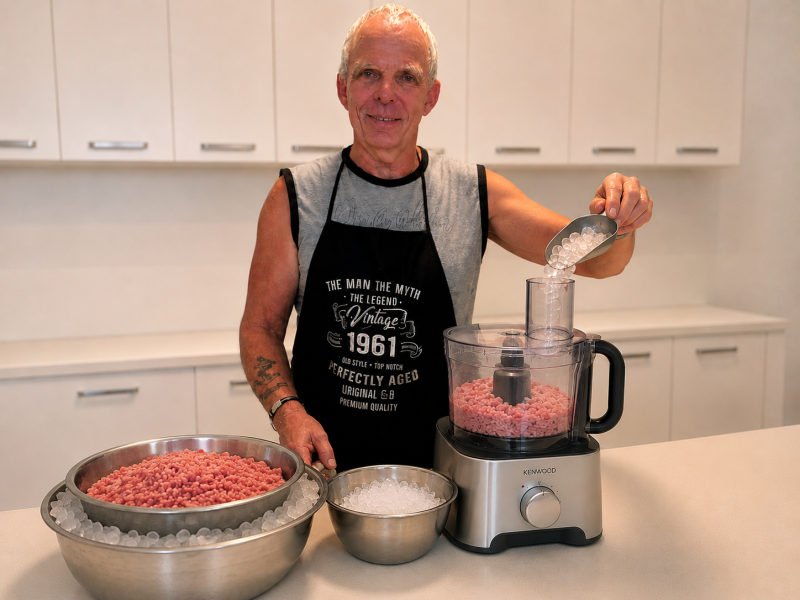
A household food processor can perform the same basic task on a smaller scale.
The important difference is capacity. Don't try to process an entire large sausage batch at once. Divide the mixture into portions your food processor can handle comfortably and process each batch separately.
Start with Properly Chilled Meat and Fat
Temperature control begins long before the food processor is switched on.
Trim and cut the meat and fat into grinder-sized pieces and chill them thoroughly. As with our other sausage recipes, placing the prepared meat in the freezer for approximately 1–2 hours before grinding gives you a good starting point.
The pieces should be very cold and firm but still suitable for grinding.
Chill the grinder knife and plate as well.
Grind Before Fine Processing
Fine sausage mixtures should normally begin with finely ground meat rather than large chunks placed directly into the food processor.
Follow the grinding specification of your recipe. A fine plate—often around 3 mm—is commonly used as the preparation stage for an emulsified sausage.
Once ground, keep the meat cold. If it has warmed noticeably during grinding, return it to the freezer briefly before continuing.
Prepare Your Ice Before You Start
Crushed ice or ice flakes serve two important purposes.
First, they provide the water required by the formulation. Secondly—and just as importantly—they absorb some of the heat generated by the rapidly moving food-processor blade.
Weigh the ice according to the recipe rather than adding an arbitrary amount.
Have it ready before you begin processing so you don't have to stop halfway through to prepare it.
Process in Manageable Batches
This is particularly important when using household equipment.
Overloading a food processor slows the cutting action, produces uneven results and can cause the motor and sausage mixture to heat unnecessarily.
Divide larger recipes into batches appropriate for your machine.
It's better to process three small batches successfully than struggle with one overloaded bowl.
Begin Developing the Bind
Place a portion of the cold ground meat into the food processor together with the salt and any ingredients specified at this stage by your recipe.
Begin processing until the meat becomes increasingly fine and sticky.
The salt helps extract the proteins needed to develop the bind.
Stop occasionally to scrape down the sides of the processor bowl so everything is processed evenly.
Add the Ice Gradually
Rather than adding all the ice at once, incorporate it progressively while processing.
This helps control both consistency and temperature.
As processing continues, the mixture should become smoother and increasingly cohesive.
The ice will gradually disappear into the sausage mixture rather than remaining as visible pieces.
Incorporate the Fat
Depending on the recipe and technique being used, the chilled fat is incorporated as the emulsion develops.
The objective is to reduce the fat into very fine particles while allowing the extracted meat proteins to hold the fat and water within the mixture.
Continue processing only as long as necessary to achieve the required smooth texture.
More processing isn't automatically better. Every additional second generates heat.
Watch the Temperature
This is the most important part of the entire process.
A food processor generates heat very quickly through friction. The mixture can go from beautifully cold to dangerously warm much faster than many beginners expect.
Use a digital probe thermometer and check the temperature regularly during processing.
For many fine sausage formulations, I aim to keep the mixture below approximately 12°C throughout processing.
Your particular recipe may specify a lower finishing temperature, and that instruction should take priority.
If the temperature is climbing too quickly, stop processing and chill the mixture before continuing.
Never sacrifice temperature control simply to make the mixture a little smoother.
What Should the Finished Mixture Look Like?
A properly processed fine sausage mixture should look smooth, glossy and cohesive.
You shouldn't see the clearly defined meat and fat particles found in a coarse sausage.
The mixture should also remain thick and sticky rather than becoming runny or visibly greasy.
If you see liquid separating or fat beginning to appear as an oily coating, something is going wrong—usually temperature, processing or binding.
What About Phosphate-Based Cutter Aids?
Some traditional and professional fine-sausage formulations use a phosphate-based cutter aid, often called Kutterhilfsmittel in German sausage making.
These products can improve protein extraction, water binding, emulsion stability and consistency.
They can be useful, but they aren't a substitute for good technique.
If you use one, follow the manufacturer's instructions and the quantity specified in the recipe. Different products have different formulations and recommended usage rates.
Combine Separate Batches Thoroughly
If you've processed the sausage mixture in several batches, transfer them into a large chilled bowl and combine them thoroughly before stuffing.
This ensures that any small differences between individual food-processor batches are distributed throughout the final mixture.
Keep the combined mixture cold while preparing the stuffer.
Work Quickly When Stuffing
A fine sausage mixture has already undergone considerable mechanical processing, so don't leave it sitting in a warm kitchen while you prepare your equipment.
Your casings and stuffer should ideally be ready before you begin the final processing stage.
Transfer the finished mixture to the stuffer, fill the casings according to your recipe and return the sausages to refrigeration whenever there's a delay before the next stage.
Cooking Sets the Structure
Fine sausages are commonly finished by controlled poaching, smoking and cooking, or—in products such as Leberkäse—baking.
During heating, the protein structure sets and gives the sausage its characteristic firm, smooth texture.
The exact cooking method and temperatures depend on the product, so follow the individual recipe rather than applying one finishing method to every emulsified sausage.
What Does a Broken Emulsion Look Like?
Sometimes you won't realise an emulsion has failed until the sausage is cooked.
Common signs include:
- pockets of rendered fat beneath the casing;
- liquid collecting inside the sausage;
- a greasy cut surface;
- a dry or crumbly interior despite plenty of fat in the recipe;
- an uneven or porous texture instead of a smooth, cohesive interior.
If this happens, don't simply change the recipe next time. Look back at your process—particularly the temperature of the mixture during fine processing.
Fine Sausage Making in a Home Kitchen
Making your first fine sausage is an important step because it demonstrates how much can be achieved with ordinary kitchen equipment.
You don't need a butcher's shop or an industrial bowl cutter.
You need cold ingredients, a suitable grinder, a food processor, a thermometer and an understanding of what you're trying to achieve.
Once you've mastered those fundamentals, an entirely new range of sausages becomes possible—from Fine Bratwurst and Frankfurters to Lyoner and many other traditional fine-textured products.
Reference: Fine Sausage Emulsion Checklist
| Stage | What to Aim For | Common Problem |
|---|---|---|
| Meat & Fat | Very cold and firm before grinding. | Warm, soft fat can smear before emulsification even begins. |
| Grinding | Clean, fine grind according to the recipe. | Poor grinding creates unnecessary heat and smearing. |
| Food Processor | Work in manageable batches. | Overloading produces uneven processing and excessive heat. |
| Ice | Weigh accurately and incorporate progressively. | Adding uncontrolled amounts changes the formulation. |
| Temperature | Monitor continuously and generally remain below about 12°C unless the recipe specifies otherwise. | Excessive temperature can destabilise the mixture. |
| Finished Mixture | Smooth, sticky, glossy and cohesive. | Greasy or separating mixture may indicate a failing emulsion. |
| Multiple Batches | Combine thoroughly in a chilled bowl. | Separate batches may otherwise differ slightly in seasoning and texture. |
| Finishing | Follow the cooking method specified by the recipe. | Poaching, smoking and baking aren't interchangeable for every product. |
Dieter's Tip
Your thermometer is more important than the clock. Don't process the mixture for a fixed number of minutes simply because a recipe or video tells you to. Watch the texture and watch the temperature. If the mixture is approaching your temperature limit, stop. You can always chill it and continue, but once an emulsion has broken because it became too warm, recovering it is much more difficult.