When I first started making sausages at home, I didn't have a meat grinder. In fact, my first batch of Thai sausages was made with minced meat from the butcher, a plastic funnel and the handle of a wooden spoon.
Those first sausages were far from perfect, but they tasted fantastic. More importantly, they showed me that making sausages at home doesn't require a workshop full of professional butcher's equipment.
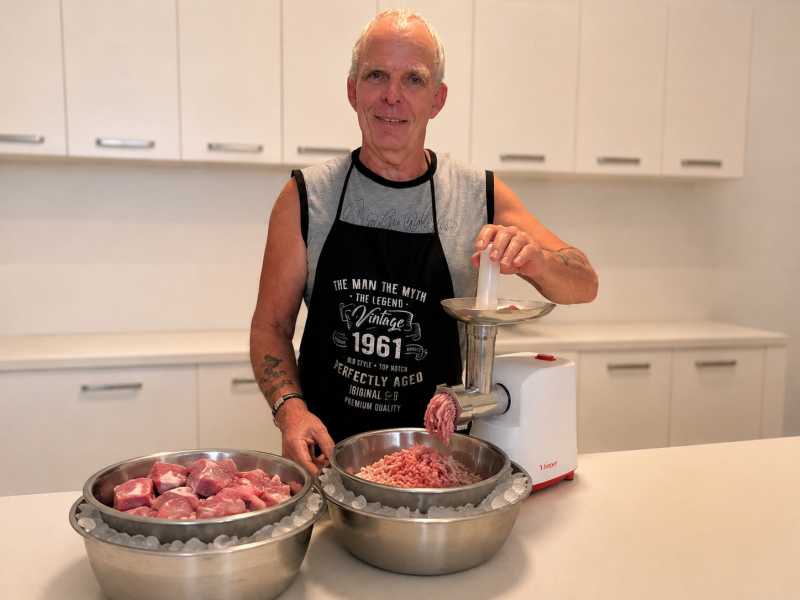
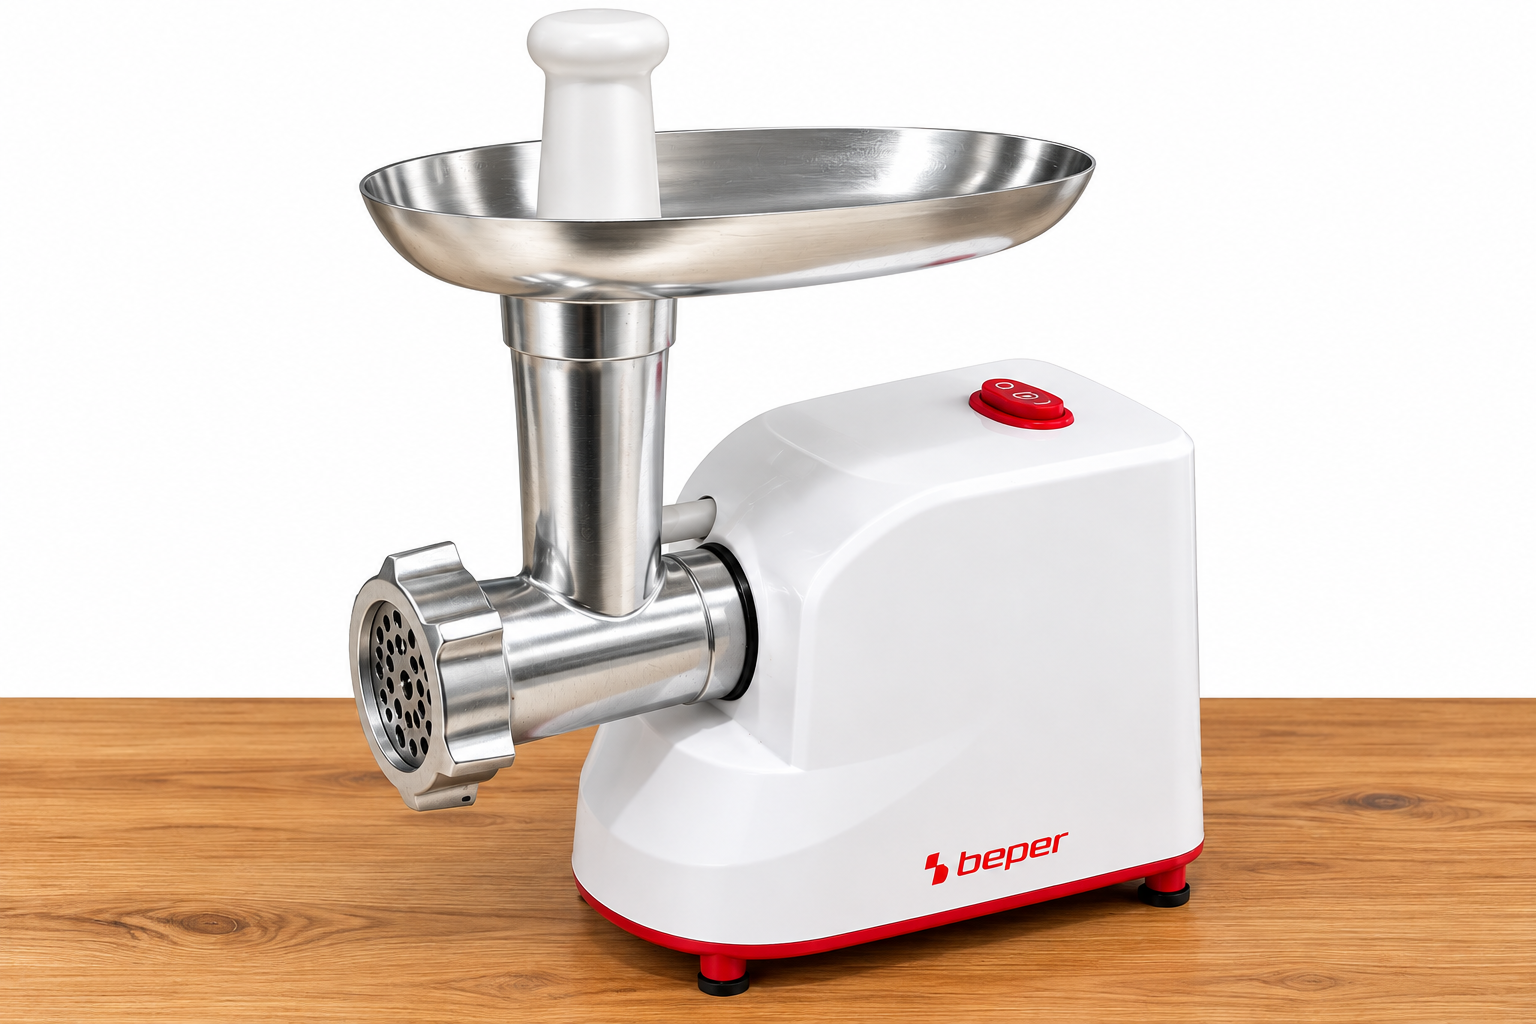
Over the years, my equipment has gradually improved. One of the useful additions to my kitchen is the compact electric meat grinder shown in my photograph.
It's a BEPER electric meat grinder, and it's the machine I use in my own kitchen. I haven't chosen it because of impressive technical specifications or professional features. What matters to me is having a practical way to grind meat for my homemade sausages.
The Meat Grinder I Use
My grinder is a standalone electric machine with a metal grinding attachment and a large metal feeding tray.
It has a compact white housing, a straightforward control switch and a plastic food pusher for guiding the meat into the feeding tube.
The photograph shows the grinder assembled with its grinding plate fitted at the front.
It's a relatively simple arrangement, which suits the way I like to make sausages at home.
I normally work with fairly small quantities of meat. A batch of around 1 kg is often sufficient for a small household, although the same recipes can easily be increased when needed.
For this type of home sausage making, I prefer practical equipment that doesn't require a large amount of space.
Why I Prefer Grinding My Own Meat
One of the advantages of having a meat grinder is being able to choose exactly what goes into the sausage mixture.
When buying ready-minced meat, you don't always know the precise proportion of lean meat and fat. The grinding texture may also be different from what you want for a particular sausage.
By preparing the meat myself, I can select the cuts, weigh the fat separately when necessary and decide how finely or coarsely the mixture should be ground.
For example, a rustic fresh sausage may benefit from a coarser texture, while a fine bratwurst requires much finer processing and additional mixing.
Of course, a meat grinder doesn't automatically produce a fine sausage emulsion. For very finely textured sausages, I may also use a food processor after grinding.
Preparing the Meat Before Grinding
One of the most important lessons I've learned is that the temperature of the meat matters just as much as the grinder itself.
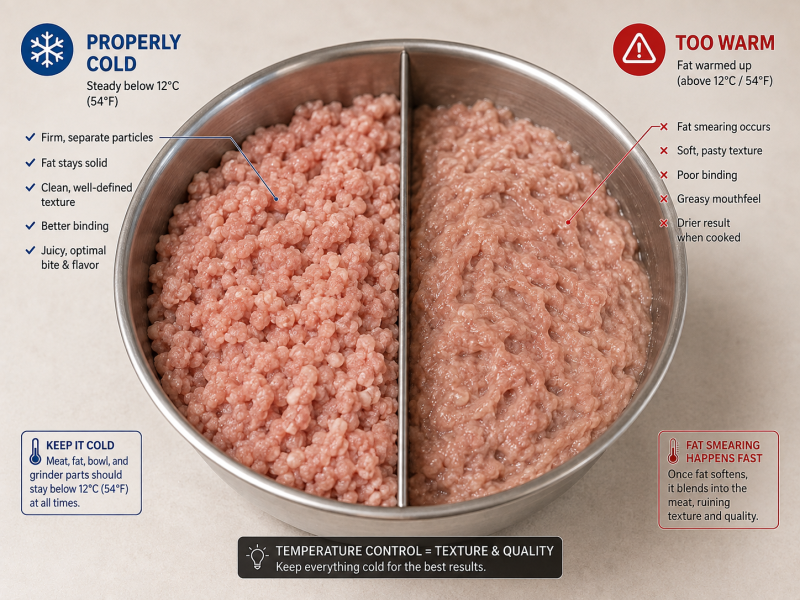
Warm meat and soft fat can cause problems during grinding. Instead of being cut cleanly, the fat may smear through the mixture, affecting the texture of the finished sausage.
Before grinding, I cut the meat and fat into pieces small enough to fit comfortably into the feeding tube.
I then chill them thoroughly. Depending on the size of the pieces and their starting temperature, I often place them in the freezer for approximately one to two hours before grinding.
The aim is to make the meat very cold and the fat firm, without allowing the pieces to freeze solid.
I also prefer to start with cold grinder components whenever practical.
This simple preparation can make a considerable difference to the grinding process.
Choosing the Grinding Texture
Different sausages require different textures, and the grinding plate plays an important role.
A plate with larger holes produces a coarser mince, while smaller holes produce a finer result.
For many fresh sausages, a medium grind is a good starting point. For other recipes, a coarse or fine grind may be more appropriate.
Some sausages also benefit from being ground twice, particularly when a finer and more uniform mixture is required.
However, double grinding isn't necessary for every recipe. Sometimes a single pass through the grinder gives exactly the texture I'm looking for.
The important thing is to choose the grinding method according to the sausage rather than assuming that finer is always better.
Grinding Meat Without Smearing the Fat
One problem that beginners sometimes encounter is fat smearing.
Instead of producing clearly defined pieces of meat and fat, the grinder begins pushing out a soft, sticky mixture.
This can happen when the meat becomes too warm, the cutting components are not working properly or the grinder is overloaded.
To reduce the risk, I pay attention to a few basic points:
- Keep the meat and fat thoroughly chilled before grinding.
- Cut the meat into pieces that feed easily into the grinder.
- Feed the meat steadily without forcing it through the machine.
- Use the supplied food pusher rather than fingers or improvised tools.
- Make sure the blade and grinding plate are correctly fitted and in good condition.
- If the meat begins to smear or the machine struggles, stop and check the cause before continuing.
A good grinder helps, but careful preparation and proper technique are just as important.
Is an Electric Grinder Necessary for Beginners?
Absolutely not.
As I mentioned earlier, I made my first sausages without owning a grinder or even a proper sausage stuffer.
There is nothing wrong with buying freshly minced meat from a butcher, especially when you're just starting out and want to discover whether homemade sausage making is something you enjoy.
A small manual grinder can also be an option for occasional batches.
An electric grinder becomes more interesting when you start making sausages regularly, want greater control over the meat mixture or prefer to prepare your own cuts of meat.
My advice is to start with what you have and only invest in additional equipment when you find that you genuinely need it.
Using My Beper Grinder to Stuff Sausages
One thing I particularly appreciate about my Beper meat grinder is that I can also use it to stuff sausages with the appropriate stuffing attachment.
In fact, until quite recently, I used this machine for both grinding the meat and stuffing my sausages.
For a home sausage maker, this is a practical advantage. Instead of buying two separate machines, you can start with one piece of equipment that performs both jobs.
Of course, grinding meat and stuffing sausages are two different processes.
When grinding, the machine cuts the meat and pushes it through a grinding plate. When stuffing, the prepared sausage mixture needs to pass through the stuffing attachment and into the casing.
Using a meat grinder for stuffing works, but it requires a little practice. The feeding speed needs to be controlled, and care must be taken not to overfill the casings or trap too much air.
Compared with a dedicated sausage stuffer, a grinder can make it more difficult to control the flow of sausage mixture. This is particularly noticeable when working with larger batches or delicate casings.
Nevertheless, I used this method for a long time, and it allowed me to make plenty of homemade sausages without investing in additional equipment.
Although I have recently moved on to a different stuffing setup, I still use my Beper grinder for stuffing small experimental batches.
When I want to try a new spice combination or test a recipe in a small quantity, I don't necessarily want to bring out more equipment than I need.
For these smaller experiments, the grinder and its stuffing attachment remain a convenient solution.
This is also something I would recommend to beginners: before investing in a dedicated sausage stuffer, find out whether your existing meat grinder has a suitable stuffing attachment.
You may discover that it is perfectly adequate for your first batches of homemade sausages.
Cleaning and Looking After the Grinder
Good cleaning habits are essential when working with raw meat.
After grinding, I dismantle the removable grinding components and clean away any remaining meat and fat.
The feeding tray, grinding tube, screw, blade and grinding plate all need careful attention because small pieces of meat can remain in corners and around the cutting components.
Before cleaning, I always make sure the machine is switched off and disconnected from the electricity supply.
The removable parts should be washed and dried according to the manufacturer's instructions. Not every metal grinder component is dishwasher-safe, and some materials can discolour or corrode if cleaned incorrectly.
The electrical motor housing must never be immersed in water.
Once everything is completely dry, the grinder can be reassembled or stored ready for the next batch.
My Conclusion
My BEPER electric meat grinder is another example of the type of equipment I use for making sausages at home.
It's a compact, straightforward machine that allows me to prepare minced meat for my own sausage recipes.
For me, the biggest advantage of owning a grinder is having more control over the ingredients and texture of the sausage mixture.
But I certainly wouldn't suggest that everyone needs to buy an electric grinder before making their first sausages.
Start with good ingredients, learn the basic techniques and use the equipment available to you. As your experience grows, you can decide which tools are worth adding to your kitchen.
That's exactly how my own sausage-making journey began.
Dieter's Tip: If there's one thing I would recommend before grinding meat, it's keeping everything cold. Chill the meat and fat thoroughly, and don't rush the process. Even a good electric grinder will struggle to produce a clean grind if the fat becomes too warm. Cold ingredients and a sharp, correctly assembled cutting system are often more important than having an expensive machine.