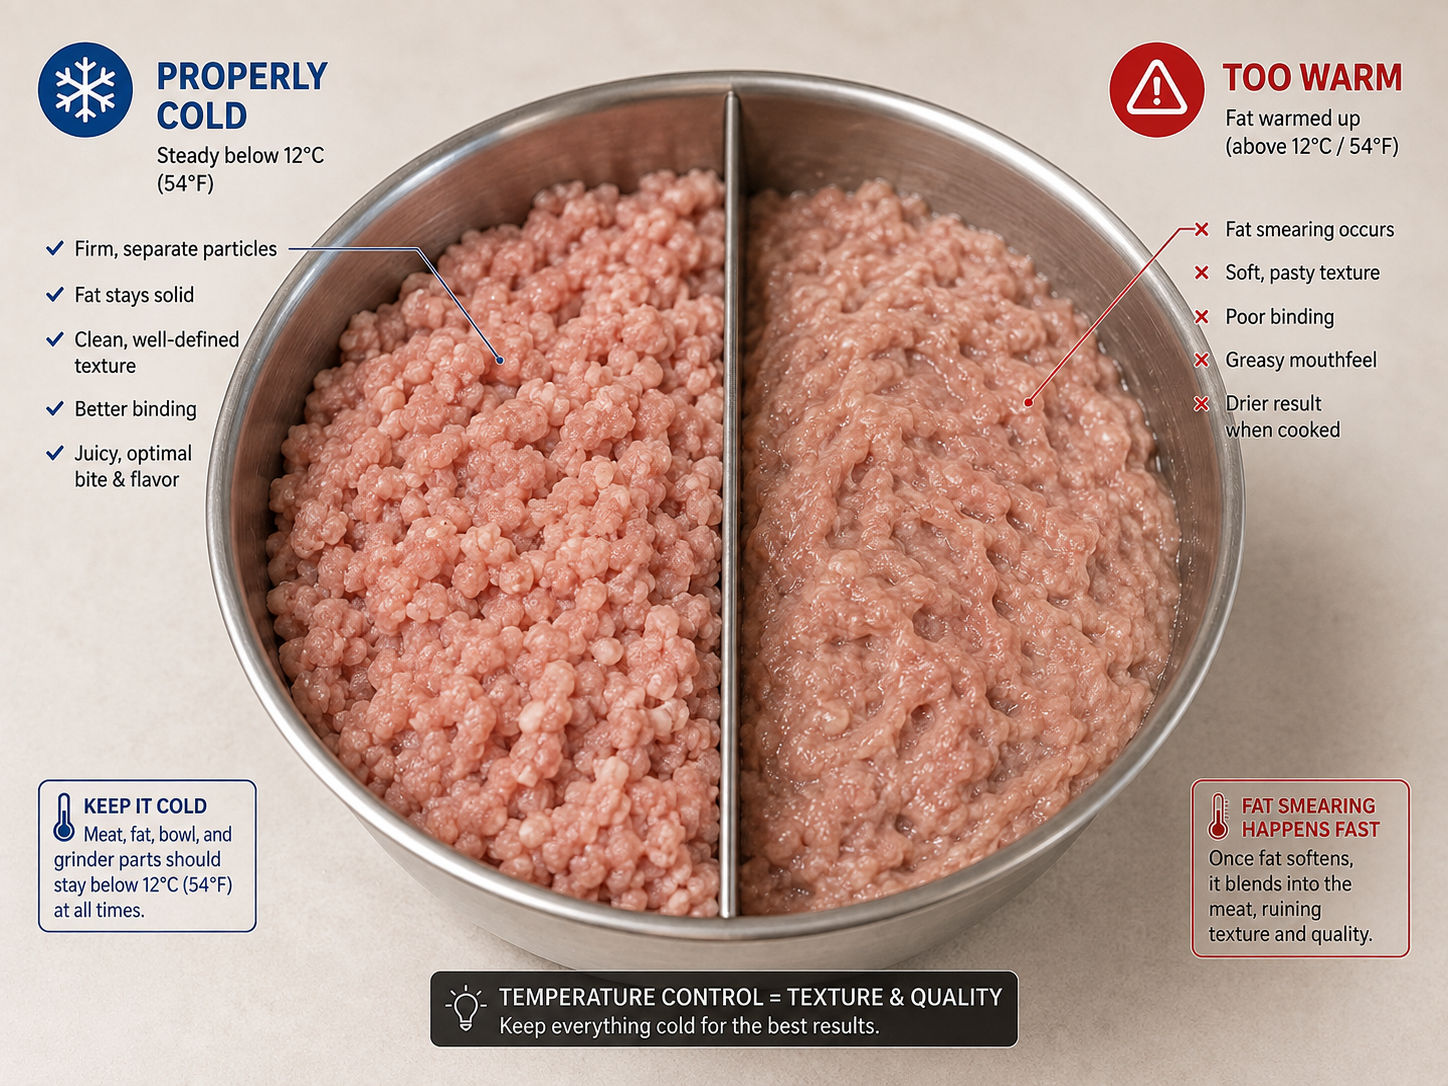
When you grind properly chilled meat and fat, the result should look clean and well defined. You should be able to distinguish the particles of lean meat from the small pieces of fat distributed throughout the mixture.
If instead the fat begins coating the meat, collecting around the grinder plate or turning the mixture into a soft, greasy mass, you're probably experiencing fat smearing.
It's one of the most common grinding problems in sausage making, but fortunately it's also one of the easiest to prevent once you understand what causes it.
What Is Fat Smearing?
During a clean grind, the grinder knife cuts firm pieces of meat and fat against the plate before pushing them through the holes.
When the fat becomes too soft, it no longer cuts cleanly. Instead, it is crushed and spread across the meat and grinder components.
The result is exactly what the name suggests: the fat becomes smeared rather than remaining as clearly defined particles.
What Does Fat Smearing Look Like?
A clean grind normally has a loose, defined appearance. Lean meat and fat remain visually distinguishable, particularly when using a medium or coarse grinding plate.
Signs of smearing can include:
- Fat coating the surface of the ground meat.
- A greasy or shiny appearance.
- Meat emerging from the grinder as a soft mass rather than distinct particles.
- Fat collecting around the holes of the grinding plate.
- The mixture feeling unusually soft or greasy in your hands.
If you notice these signs, don't simply continue grinding and hope they'll disappear. Stop and find out what's causing the problem.
Temperature Is Usually the First Thing to Check
Soft fat is much more difficult for a grinder to cut cleanly than firm, well-chilled fat.
This is why we repeatedly chill our prepared meat and fat before grinding. Once cut into grinder-sized pieces, I normally place them in the freezer for approximately 1 to 2 hours.
The goal isn't to freeze everything into a solid block. The pieces should be thoroughly chilled and firm, with the surface beginning to stiffen, while still being able to pass safely through the grinder.
Cold fat cuts. Warm fat smears.
Keep the Grinder Cold Too
Starting with cold meat but feeding it through warm grinder components works against everything you've just done.
Whenever practical, chill the grinder plate, knife and auger before grinding. I usually place the removable metal components in the freezer while the prepared meat is chilling.
That gives both the meat and the grinder the best possible starting temperature.
Use a Bowl in an Ice Bath
Once meat leaves the grinder, it immediately begins absorbing heat from the surrounding kitchen.
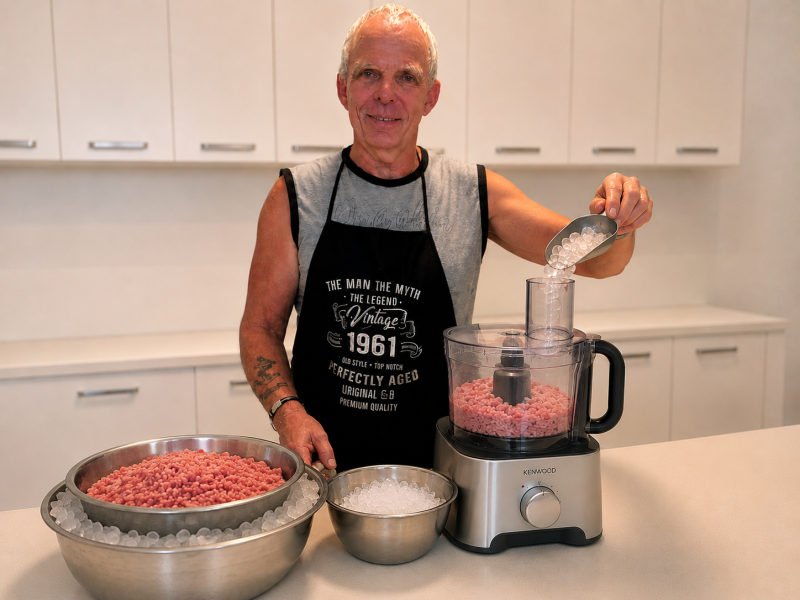
A very simple solution is to grind directly into a stainless-steel bowl placed inside a larger bowl containing ice.
This is the method I regularly use at home. It requires no specialised equipment and helps keep the ground meat cold while the remainder of the batch is being processed.
Your Knife and Plate Must Work Together
Temperature isn't the only possible cause of smearing.
The grinder knife should sit flat against the grinding plate so the two surfaces create a clean cutting action. If either surface is worn, damaged or dull, the grinder may begin crushing and tearing the meat rather than cutting it.
A sharp knife with a properly maintained plate can make a surprisingly large difference to the quality of the grind.
Check That the Grinder Is Assembled Correctly
If a grinder that normally performs well suddenly starts producing a poor grind, check the assembly before blaming the meat.
Make sure the knife is installed in the correct orientation, with its cutting edges facing the grinding plate. The plate should sit correctly in position and the retaining ring should hold the assembly securely together.
A knife installed backwards cannot cut properly and can quickly turn a grinding session into a frustrating experience.
Don't Force the Meat Through
The grinder should be doing the cutting—not your arm.
Feed pieces steadily into the hopper and use the pusher only as required. Excessive force doesn't make a struggling grinder work better.
If meat stops feeding normally, the grinder slows considerably or you find yourself constantly forcing meat through the feed tube, stop and investigate.
Connective tissue may have wrapped around the knife, the plate may be becoming blocked, or the meat may simply have become too warm.
Remove Tough Sinew During Preparation
Long strands of tough connective tissue can wrap around the grinder knife and interfere with its cutting action.
This doesn't mean you need to remove every tiny piece of connective tissue from your meat, but large pieces of silver skin and particularly tough sinew are better removed during preparation.
If the grinder's performance deteriorates during a batch, switch it off safely, dismantle it and check the knife before continuing.
Be Particularly Careful with Fine Grinding
Smaller grinding plates create more resistance and process the meat more intensively than coarse plates.
That makes temperature control especially important when using a 3 mm plate or when grinding meat more than once.
If you're performing a double grind, check the meat after the first pass. If it has softened, return it to the freezer until it is thoroughly chilled and firm again before beginning the second grind.
Never feel that you have to rush directly from the first grind into the second.
What If Smearing Starts While You're Grinding?
Stop.
That's often the best thing you can do.
Put the meat back into the refrigerator or freezer and allow it to firm up again. If necessary, chill the grinder components at the same time.
While everything is cooling, check the knife and plate for accumulated sinew or fat and make sure the grinder is assembled correctly.
Ten or twenty minutes spent correcting the problem is far better than processing an entire batch through a grinder that isn't cutting properly.
Why Does Fat Smearing Matter?
Fat smearing isn't simply a cosmetic problem.
Good sausage texture depends on keeping the meat, fat and moisture properly structured throughout grinding, mixing and cooking.
When the fat is badly smeared, that structure begins to break down before the sausage has even been stuffed. During cooking, this can contribute to excessive fat loss, greasy pockets and a less attractive or less satisfying texture.
In coarse sausages, you'll also lose the attractive definition between lean meat and fat that should be visible when the sausage is cut.
Prevention Is Easier Than Correction
Fortunately, preventing fat smearing doesn't require expensive equipment.
Start with properly chilled meat and fat. Chill the grinder components. Keep the ground meat over ice. Make sure the knife and plate are sharp and correctly assembled. Feed the grinder steadily rather than forcing it.
And most importantly, pay attention to what is coming out of the grinder.
A clean grind tells you that everything is working properly. If the appearance begins to change, stop and correct the problem before continuing.
Reference: Troubleshooting Fat Smearing
| What You Notice | Possible Cause | What to Check |
|---|---|---|
| Soft, greasy grind | Meat or fat is too warm. | Stop and thoroughly chill the meat and fat before continuing. |
| Fat coating the grinder plate | Soft fat or poor cutting action. | Check temperature, knife sharpness and plate condition. |
| Meat is crushed rather than cut | Dull knife, worn plate or incorrect assembly. | Inspect the knife and plate and confirm that the knife is facing the correct direction. |
| Grinder gradually slows down | Connective tissue may be wrapping around the knife. | Stop safely, dismantle the grinder and clean the cutting assembly. |
| First grind is good, second grind smears | The meat warmed during the first grind. | Chill the ground meat again before the second pass. |
| Fine grind becomes pasty | Excessive heat or resistance through the fine plate. | Chill everything thoroughly and allow the grinder to work without excessive pressure. |
Dieter's Tip
Watch the meat as it comes through the grinder. It's one of the best indicators you have. If the particles are clean and the fat remains clearly defined, keep going. If the mixture suddenly starts looking soft, shiny or greasy, stop. A short trip back to the freezer can save the entire batch.