Good smoked sausage doesn't begin when you light the smoker.
It begins with how you prepare the sausages beforehand.
You can have the right wood, perfect smoker temperature and plenty of experience controlling the fire, but if the sausages go into the smoker wet, unevenly stuffed or packed tightly together, the finished result may still disappoint.
Preparing sausages for smoking isn't particularly complicated. Most of the work involves giving the sausages a little time and creating the right surface conditions before smoke is introduced.
Do that properly and you'll achieve more even colour, better smoke adhesion and a much more attractive finished sausage.
Start with a Sausage Designed for Smoking
Before anything else, make sure the sausage you're preparing is actually suitable for the smoking process you intend to use.
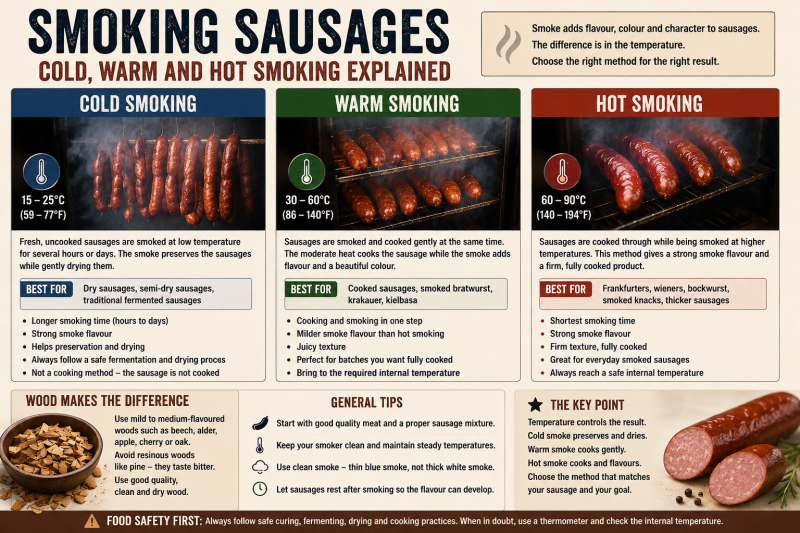
Cold smoking, warm smoking and hot smoking are different techniques, and a sausage intended for one method shouldn't automatically be treated as suitable for another.
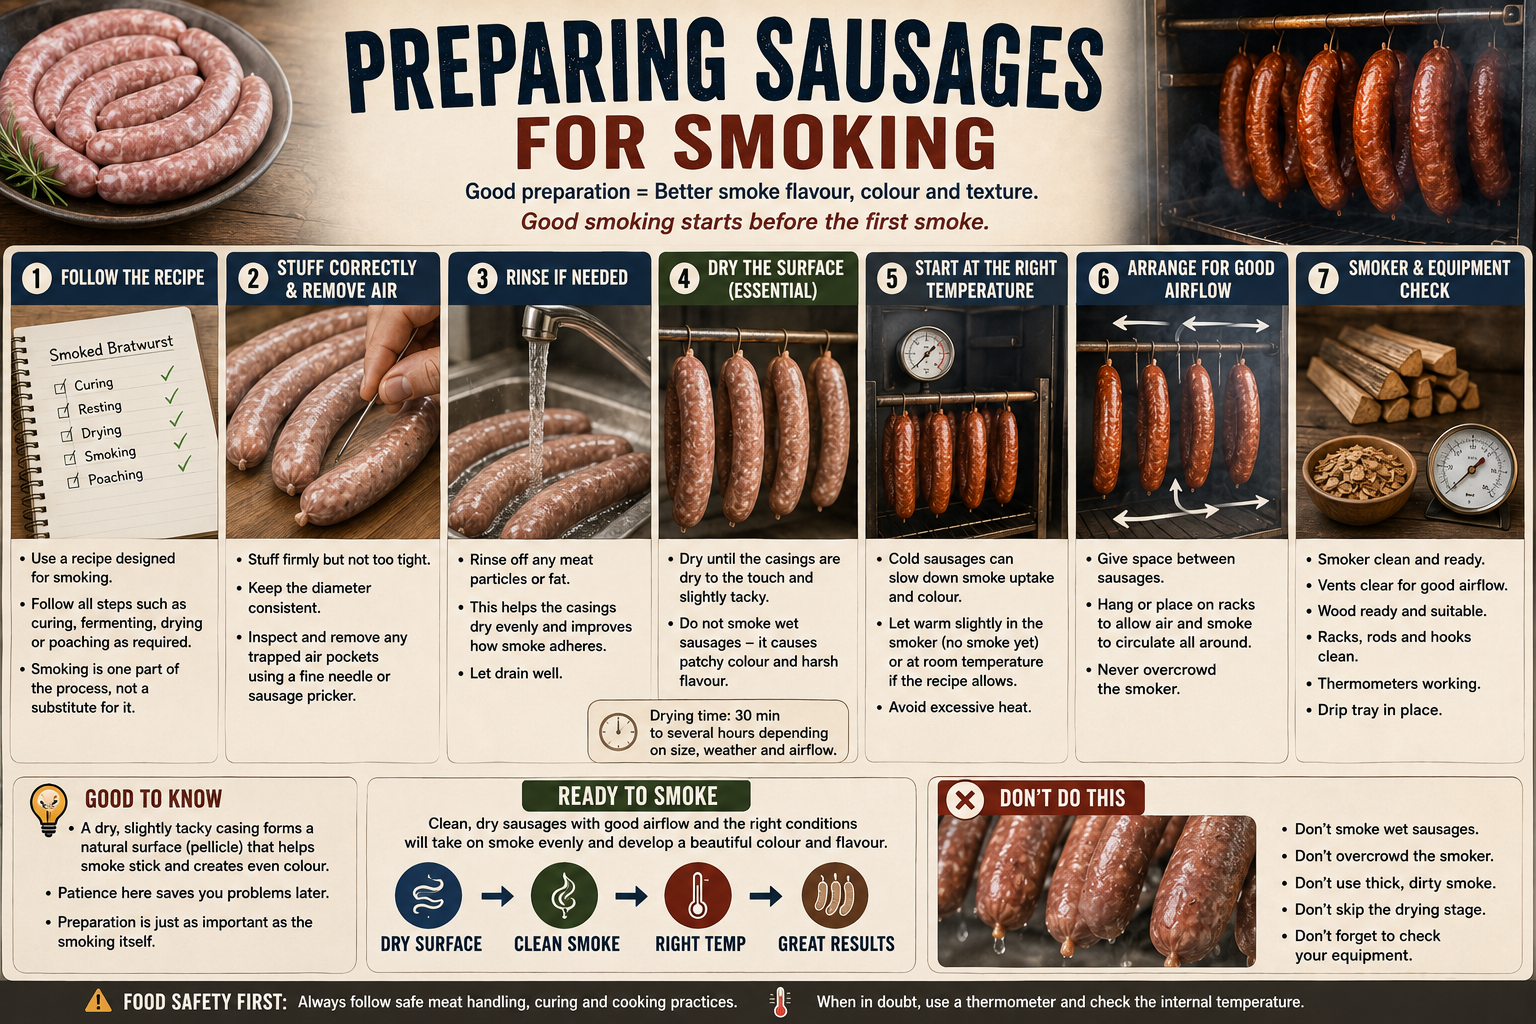
If the recipe specifies curing salt, fermentation, drying, poaching or another processing step, follow the complete procedure.
Smoking is one part of the recipe, not a substitute for the other steps.
Stuff the Casings Evenly
Good preparation actually starts while you're stuffing.
Try to produce sausages of reasonably consistent diameter and fill the casing firmly without stretching it excessively.
Very loose sections can produce an uneven shape, while overstuffed casings are more likely to split as the sausage heats.
Uniform diameter also helps the sausages heat at approximately the same rate when warm or hot smoking.
Remove Air Pockets
Inspect the sausages after stuffing and linking.
If you can see obvious pockets of trapped air beneath the casing, release them carefully using a clean, sanitised sausage pricker or very fine needle.
Prick only where necessary and gently massage the trapped air towards the opening.
There's no reason to cover the sausage with holes. We're correcting obvious air pockets, not perforating the casing.
Clean the Casings if Necessary
Stuffing can leave small amounts of sausage mixture, fat or seasoning on the outside of the casing.
If necessary, rinse the sausages gently with clean, cool water to remove this residue.
A clean casing will dry more evenly and ultimately produce a more consistent smoked surface.
After rinsing, allow excess water to drain away before beginning the drying stage.
Drying the Surface Is Essential
This is probably the most important preparation step before smoking.
Don't put soaking-wet sausages straight into the smoker and immediately start producing smoke.
Smoke adheres much more evenly to a properly dried surface.
Wet casings can produce patchy, streaky or dull colour and may encourage smoke deposits that give the sausage an unattractive appearance or harsher flavour.
What we're looking for is a casing that feels dry to the touch and may become slightly tacky.
How Do You Dry the Sausages?
There are several ways to do it, depending on the sausage, your equipment and the recipe.
The sausages can be hung in a suitable cool environment with good airflow, placed uncovered in the refrigerator, or initially dried in the smoker without smoke if the equipment allows sufficiently controlled temperature and airflow.
The important ingredients are:
- time;
- airflow;
- appropriate temperature;
- and enough space around the sausages.
Don't try to rush surface drying by exposing the sausages to excessive heat.
How Long Should They Dry?
There isn't one fixed time that works for every sausage.
A small sausage in good airflow may dry relatively quickly, while larger sausages or humid conditions naturally require longer.
Rather than relying entirely on the clock, look at and feel the casing.
The outside should no longer appear wet or feel slippery.
The condition of the surface is more important than an arbitrary drying time.
Why a Slightly Tacky Surface Is Useful
During drying, the surface can develop a slightly tacky character sometimes referred to as a pellicle.
This gives smoke a suitable surface onto which it can settle and helps produce more uniform colour and flavour.
You don't need to turn this into a complicated scientific test.
If the casing is clean, dry to the touch and slightly tacky rather than wet, you're generally moving in the right direction.
Don't Let the Sausages Touch
Whether you're drying them or smoking them, give the sausages some space.
If two sausages remain pressed against each other, air and smoke can't properly reach the contact area.
When you eventually separate them, you'll often find a noticeably pale patch where the surfaces were touching.
Hang the sausages with a small gap between them, or if you're using racks, arrange them so air can circulate around as much of the surface as possible.
Hanging Sausages
Hanging is particularly convenient for many smoked sausages because air and smoke can circulate around almost the entire surface.
Make sure the rods, hooks or other supports are clean and strong enough for the weight you're hanging from them.
Don't overcrowd the smoking rods simply because another sausage will physically fit.
A little additional space usually produces a more even result.
Using Smoking Racks
Not every sausage needs to hang.
Short sausages and certain products can be smoked successfully on racks.
Again, spacing matters.
Leave room between individual sausages and make sure the smoker has sufficient airflow above and below the racks.
If the sausages remain on racks for a long smoking process, the contact area can develop differently from the exposed surface, so turning them may sometimes be useful if the recipe and process permit it.
Should Sausages Be at Room Temperature Before Smoking?
You may sometimes hear advice to leave sausages at room temperature before putting them into the smoker.
I prefer to be more careful with that recommendation.
We're working with meat, and there is no reason to leave sausages sitting unnecessarily in a warm kitchen simply to remove the chill.
If the recipe requires a drying or tempering stage, carry it out under controlled conditions appropriate for that particular sausage.
With warm and hot smoking, the smoker itself can also be used for an initial controlled drying and warming stage before smoke is introduced.
Temperature control is more important than trying to make the sausages "room temperature."
Dry First, Smoke Second
If your smoker allows independent control of heat, airflow and smoke, an initial drying stage can be very useful.
Place the sausages into the smoker with good airflow but without producing smoke yet.
Once the casing surface has dried sufficiently, smoke can be introduced.
This creates a very logical sequence:
DRY → SMOKE → COOK OR CONTINUE PROCESSING
The exact temperatures and subsequent stages depend on the sausage you're making.
Prepare the Smoker Too
Preparing the sausages is only half the job.
Before loading them, make sure the smoker itself is ready.
Check that:
- the smoker is clean;
- air inlets and exhaust vents are unobstructed;
- the thermometer is working correctly;
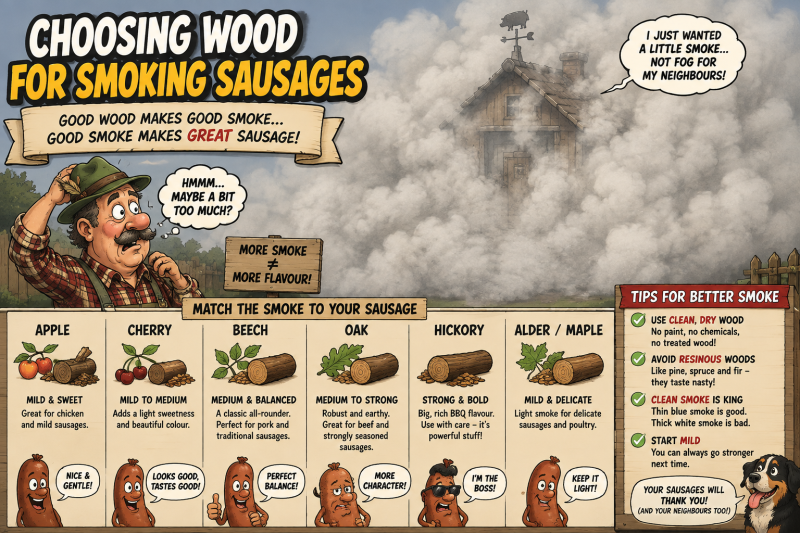
- the smoking wood is suitable and ready;
- the racks, rods and hooks are clean;
- and you understand the temperature stages required by the recipe.
It's much easier to solve these things before twenty sausages are hanging inside waiting for you.
Think About Dripping Fat
When warm or hot smoking, some fat or moisture may eventually drip from the sausages.
Depending on the smoker design, use the appropriate drip tray or protection recommended for the equipment.
Fat dripping directly onto a strong heat source can burn and create unpleasant smoke, which is very different from the clean wood smoke we're trying to produce.
Check Your Thermometers Before You Start
Smoking is a temperature-controlled process, particularly when the sausage is also being cooked.
Make sure you can monitor the smoker temperature accurately.
For hot-smoked sausages, you'll also need an appropriate way to monitor internal temperature when required by the recipe.
Don't discover halfway through the process that the thermometer isn't working or that its battery is flat.
A Simple Pre-Smoking Checklist
| Check | What You're Looking For |
|---|---|
| Recipe | Suitable for the intended smoking method and all required curing or processing steps completed. |
| Stuffing | Evenly filled casings without excessive pressure. |
| Air pockets | Obvious trapped air removed carefully. |
| Casing | Clean and free from sausage mixture or excess fat. |
| Surface | Dry to the touch, possibly slightly tacky, but not wet. |
| Spacing | Sausages separated so air and smoke can circulate. |
| Smoker | Clean, ready and capable of maintaining the required temperature. |
| Wood | Appropriate smoking wood prepared and ready to use. |
| Thermometers | Working and ready before smoking begins. |
Preparation Makes the Smoking Easier
Smoking itself gets most of the attention, but many problems blamed on the smoker actually begin before the smoke is ever produced.
Wet casings lead to poor colour. Sausages touching each other develop pale patches. Uneven stuffing gives uneven results. Poor airflow makes smoke harder to control.
None of these problems requires expensive equipment to prevent.
Give the sausages time to settle, clean them if necessary, dry the surface properly and arrange them with enough space for air and smoke to circulate.
The smoker can only work with what you put into it. Prepare the sausages properly, and you've already done much of the work towards a good smoked sausage.
Dieter's Tip
Don't rush the drying stage because you're eager to start producing smoke. If the casings still look wet, give them more time. I would rather delay smoking a little than put wet sausages into the smoker and end up with patchy colour. Clean, dry casings and good airflow make an enormous difference to the finished sausage.