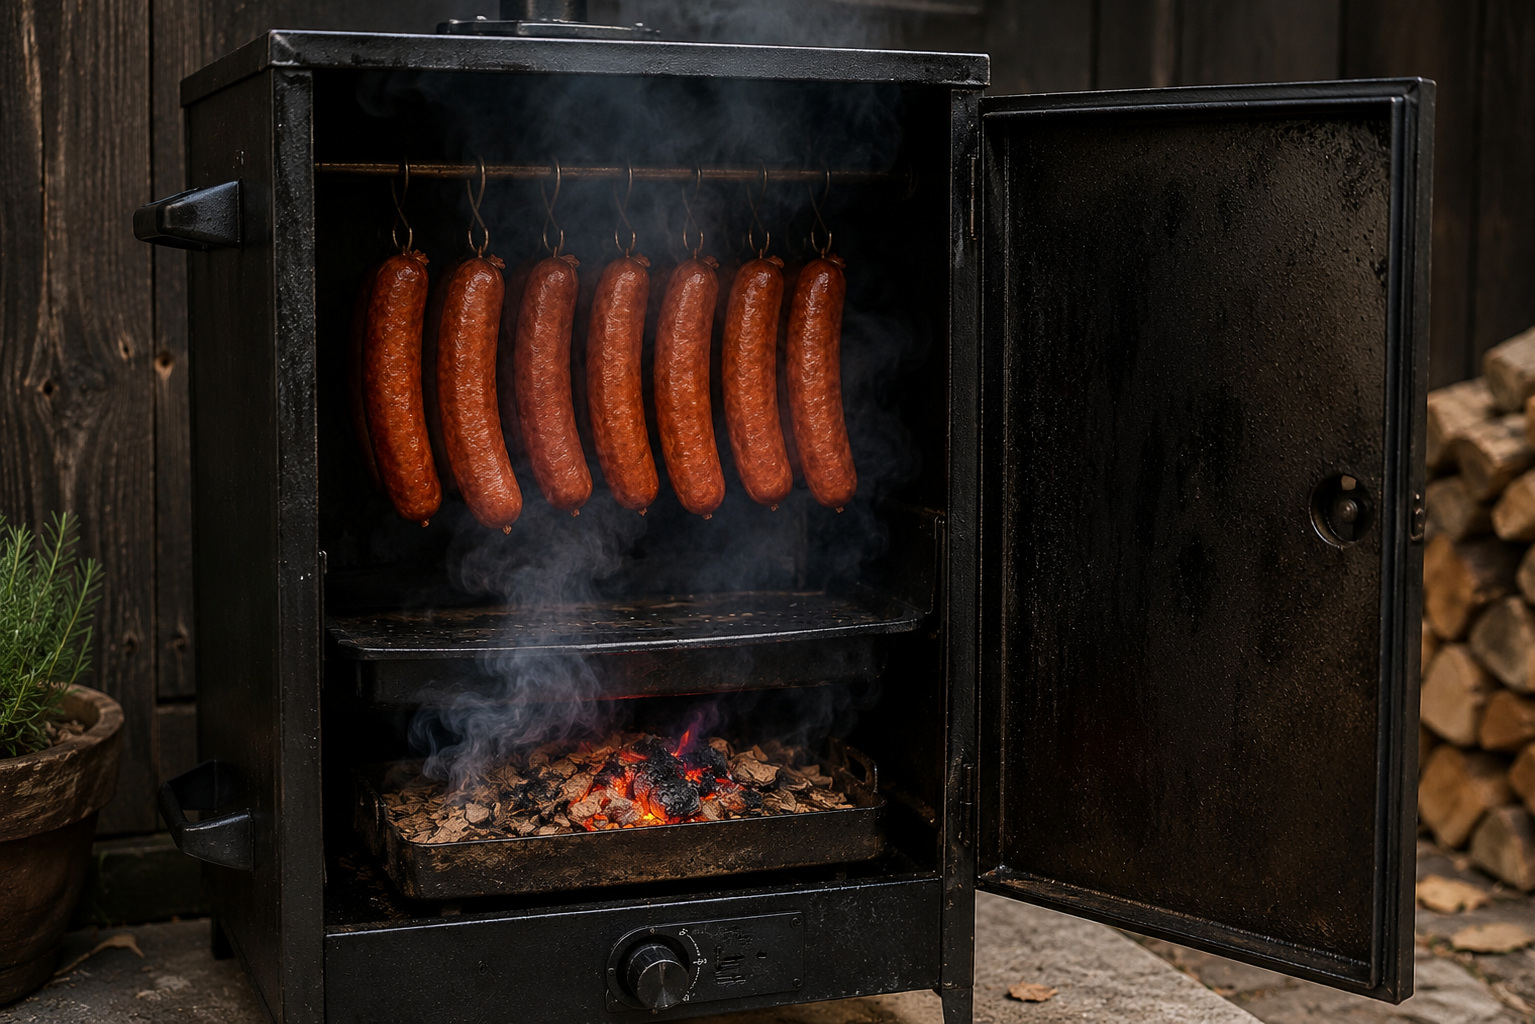
A beautifully smoked sausage should look inviting before you even cut into it.
Depending on the sausage, the wood and the smoking process, the casing might develop anything from a light golden colour to a rich amber or deep reddish brown.
But achieving that colour isn't simply a matter of filling the smoker with as much smoke as possible.
In fact, doing exactly that is one of the easiest ways to produce sausages that are dull, blotchy, excessively dark or covered with unpleasant smoke deposits.
Good smoke colour develops gradually from the combination of a properly prepared sausage, a suitable surface, clean smoke, airflow, temperature and time.
Good Colour Starts Before the Smoke
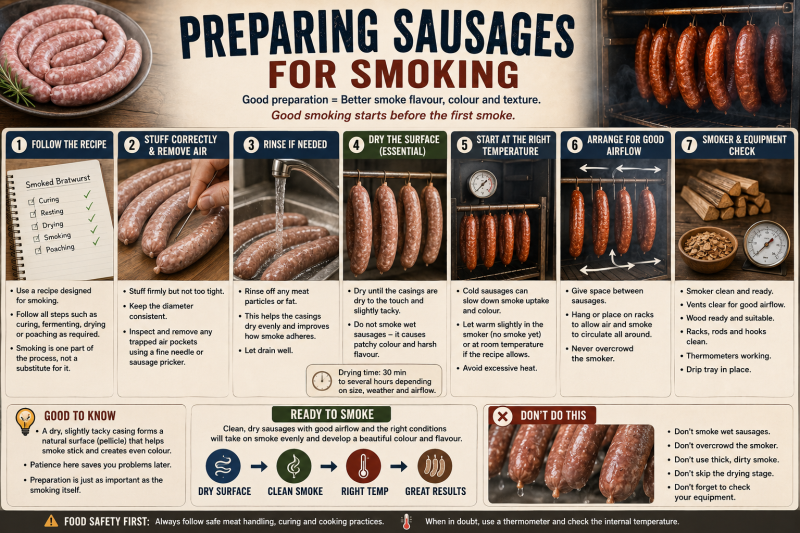
We've already discussed preparing sausages for smoking, and this is where that preparation becomes particularly important.
If sausages enter the smoker with wet casings, smoke cannot settle onto the surface in the same controlled and even way.
The result may be patchy colour, streaking or an unattractive surface.
Before introducing smoke, the casing should normally be clean and dry to the touch. Depending on the product and process, it may also develop a slightly tacky surface.
That surface gives the smoke a much better foundation on which to work.
Dry Doesn't Mean Dried Out
There is an important distinction here.
We want the surface of the casing to be dry. We don't want to dry the entire sausage until it begins losing excessive moisture.
With warm or hot-smoked sausages, this can often be achieved with an initial drying stage in the smoker using controlled heat and airflow but without smoke.
Once the casing is no longer visibly wet, smoking can begin.
Why Wet Sausages Develop Poor Colour
Imagine taking a wet sausage and immediately surrounding it with heavy smoke.
Condensation and surface moisture interfere with the way smoke components settle onto the casing. Instead of developing gradually and evenly, deposits can collect irregularly.
That's why simply adding more smoke doesn't solve poor colour caused by wet casings.
Dry the sausage first. Smoke it second.
Clean Smoke Produces Better Results
The quality of the smoke matters just as much as the amount.
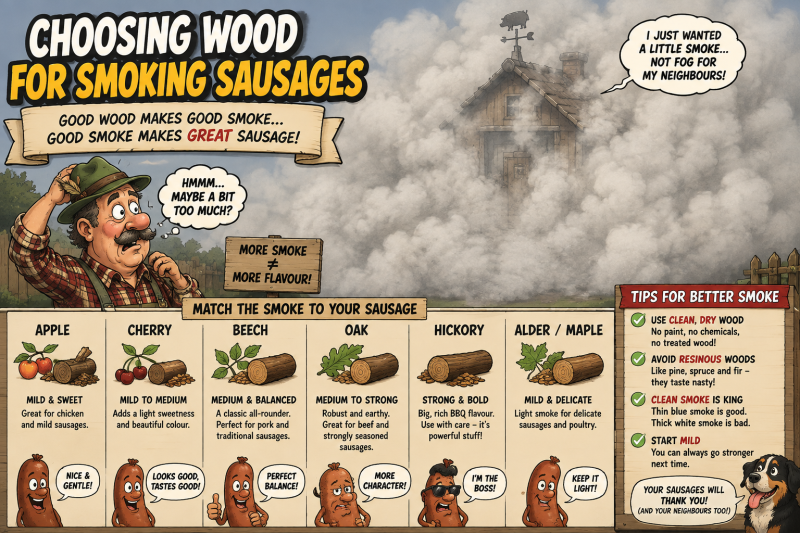
A smoker disappearing inside a huge cloud of thick white smoke might look impressive, but it isn't necessarily producing better sausages.
Heavy, dirty or poorly combusted smoke can leave excessive deposits on the casing and contribute harsh, bitter flavours.
Instead, aim for a controlled supply of clean smoke with good airflow.
You should be smoking the sausages, not trying to hide them.
More Smoke Doesn't Mean More Colour
This is probably one of the most useful lessons when learning to smoke sausages.
If the colour isn't developing quickly enough, the instinctive reaction is often to add more wood and create more smoke.
That can make the problem worse.
Colour needs time to develop.
A lighter, controlled smoke applied steadily can produce a much more attractive finish than overwhelming the sausage with dense smoke for a short period.
Think gradual development rather than instant colour.
Airflow Is Essential
Smoke needs to move.
If the smoker is packed tightly or the exhaust is restricted excessively, stale smoke can remain around the sausages instead of being continuously replaced.
Good airflow helps distribute fresh smoke around the sausages and carries away excess moisture and combustion products.
Don't close every vent simply because you want to "keep the smoke inside."
A smoker needs an appropriate path for air to enter, move through the chamber and leave again.
Give the Sausages Some Space
Airflow also explains why sausages shouldn't be packed tightly together.
If two sausages are touching, smoke can't properly reach the surfaces between them.
When you separate them later, you'll often discover noticeably pale areas at the contact points.
Hang sausages with enough space between them for smoke and air to circulate.
If you're using racks, arrange the sausages so as much of the surface as possible remains exposed.
Temperature Influences Colour Development
Temperature affects both the sausage and the smoking process.
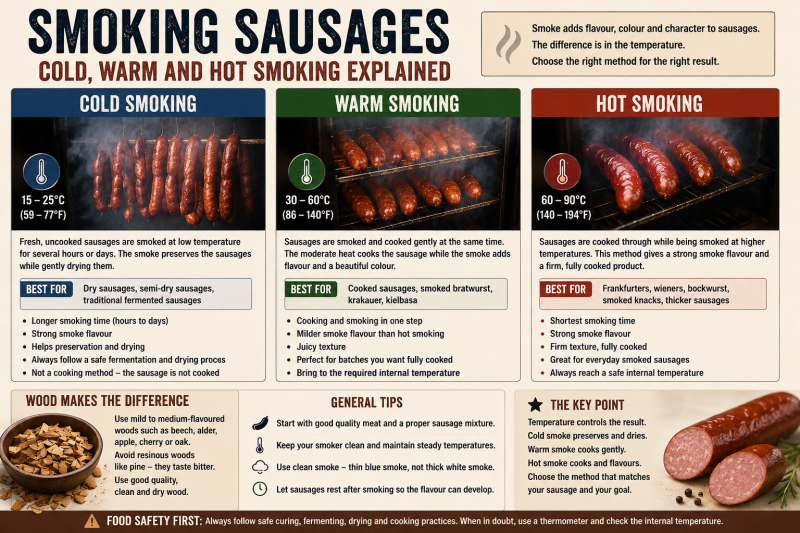
The exact temperature depends on whether you're cold, warm or hot smoking and on the particular recipe you're following.
What matters for colour is maintaining a controlled process rather than exposing the sausages to sudden excessive heat.
Too much heat can create other problems before good colour has had time to develop: fat may begin separating, casings can wrinkle or split and the sausage can start cooking too aggressively.
Don't sacrifice texture simply because you're chasing a darker colour.
Watch for Condensation
Condensation is one of the enemies of even smoke colour.
If moisture forms on the sausages during smoking, the surface can become wet again and colour may develop unevenly.
This can happen when cold sausages enter a warmer, humid environment or when temperature and airflow aren't well controlled.
If you see the casings becoming visibly wet, don't automatically respond by adding more smoke.
Correct the conditions that are causing the moisture first.
Wood Choice Changes the Colour
As we discussed in our article about choosing smoking wood, different woods don't only influence flavour. They can also contribute differently to the appearance of the finished sausage.
Fruit woods such as apple and cherry are often associated with attractive warm tones, while beech is a classic choice for developing the familiar colour of many Central European smoked sausages.
Cherry is particularly popular when an attractive reddish tone is desired.
Oak and hickory can contribute stronger smoke character and potentially deeper colour, but they should still be used with restraint.
The final appearance depends on far more than the wood alone, so don't expect changing wood species to correct poor surface preparation or bad smoke management.
Colour Isn't Only Coming From Smoke
It's worth remembering that the finished colour of a sausage isn't determined by smoke alone.
The meat, seasoning, curing ingredients where appropriate, casing, smoking temperature, cooking process and drying conditions can all influence its appearance.
A cured sausage may develop a very different internal and external colour from an uncured fresh sausage even when both are exposed to similar smoke.
That means you shouldn't judge whether a sausage has been cooked safely simply by looking at its colour.
Colour is an appearance indicator, not a food-safety thermometer.
Natural Casings Take Smoke Beautifully
Natural casings are particularly well suited to smoked sausages.
When properly prepared and dried, they allow an attractive smoked surface to develop while retaining the familiar bite we expect from many traditional sausage styles.
Make sure the casing is clean after stuffing. Meat mixture or fat smeared across the outside can cause irregular patches during smoking.
Don't Forget Humidity
Humidity and surface moisture are related, but they aren't quite the same thing.
A smoking chamber that's excessively humid can slow surface drying and encourage condensation, while extremely dry conditions combined with too much heat may dry the casing too aggressively.
The ideal conditions depend on the sausage and smoking method.
For the home sausage maker, the important lesson is simply to observe what's happening to the casing rather than concentrating only on the smoker temperature.
If the surface is wet, excessively dry, wrinkling or behaving unexpectedly, that's telling you something about the conditions inside your smoker.
Let the Colour Develop Gradually
One of the biggest improvements you can make to your smoked sausages requires no new equipment at all:
Be patient.
Don't compare the sausage after ten minutes with the dark smoked sausage you expect to see at the end.
Colour develops progressively as smoke interacts with the casing surface.
Give clean smoke time to do its work.
Rotate Only When Necessary
In a well-designed smoker with good airflow, sausages should receive reasonably even smoke exposure.
But small home smokers sometimes have obvious hot spots or areas where smoke circulates differently.
If you consistently notice one side colouring much faster than another, carefully repositioning the sausages during the process may help.
Don't continually open the smoker just to inspect them, however. Every unnecessary opening changes the temperature, humidity and airflow.
What Causes Patchy Smoke Colour?
| Problem | Possible Cause | What to Check |
|---|---|---|
| Pale patches | Sausages touching each other | Increase spacing and airflow |
| Blotchy colour | Wet or dirty casings | Clean and dry before smoking |
| Very dark surface | Too much smoke or excessive smoking time | Reduce smoke intensity and monitor colour development |
| Bitter dark deposits | Dirty, heavy smoke or poor combustion | Check fire, wood and airflow |
| Uneven colour | Poor circulation or smoker hot spots | Check spacing, airflow and sausage position |
| Colour stops developing evenly | Condensation or excessive surface moisture | Check temperature, humidity and airflow |
| Wrinkled casing | Excessive heat or overly aggressive drying | Review temperature and drying conditions |
Don't Chase a Particular Shade
Not every smoked sausage needs to look mahogany brown.
A lightly smoked chicken sausage might be beautifully golden, while another sausage may naturally develop a much deeper reddish-brown colour.
The goal isn't to make every sausage the same colour.
What you're looking for is a colour that's even, attractive and appropriate for the sausage and smoking process you're using.
A Simple Approach to Better Smoke Colour
If you're struggling to achieve attractive smoked sausages, concentrate on these basics:
- Start with clean casings.
- Dry the surface before applying smoke.
- Don't let the sausages touch.
- Maintain appropriate airflow.
- Use clean, suitable smoking wood.
- Avoid excessively thick smoke.
- Control temperature and condensation.
- Give the colour time to develop.
None of these steps is particularly complicated, but together they make an enormous difference.
Good Colour Is Usually a Sign of Good Technique
When a batch of sausages comes out of the smoker with an even golden or reddish-brown surface, it isn't simply because you found a magical smoking wood.
It's usually the result of getting several small things right.
The casings were prepared properly. The surface was dry. The sausages had room around them. The smoker had airflow. The smoke was clean. And most importantly, the process wasn't rushed.
Don't try to paint your sausages with smoke. Create the right conditions and let the colour develop naturally.
Dieter's Tip
If my sausages aren't taking on colour as quickly as expected, adding a handful of wood isn't my first reaction. I check the casings first. Are they dry? Is there condensation? Are the sausages touching? Is the smoke moving properly through the smoker? Very often the answer is there. Give a clean, dry casing light, steady smoke and enough time, and the colour will usually take care of itself.